Contents
- Command Usage Guide
- The "UserPanel" GUI
- UI Themes Showcase
- Moderation Commands Reference
- Adonis Features Showcase
Section 1: Command Usage Guide
Execution
These are the following ways by which an Adonis command can be executed by a user:
- by chat (as long as chat commands have not been disabled)
- by command console (default keybind for opening the console is '; the console may be restricted or disabled according to settings)
- by other interfaces such as :cmdbox
In all cases, the prefix (which is : by default for admin commands and ! by default for player commands) must be included at the start of each command for it to work.
ℹ️ Tip: To run a command silently in the chat (so that other players do not see it), either prepend it with "/e " (eg. "/e :kill scel") or enable chat command hiding in your client settings.
Player Selectors
Commands that take players as their argument (eg. :kill) will normally support either a singular player or a comma-separated list of player names.
Example: :god scel or :kill noob1,noob2
Note that player names are not case-sensitive and may be partial, eg. scel for Sceleratis.
In addition to simply using player names, the following special identifiers for targeting certain groups of players exist:
- me - yourself (the executor of the command)
- all - everyone in the server
- others - everyone in the server except yourself
- admins - all admins in the server
- nonadmins - everyone except admins in the server
- random - a random person in the server
- #NUM - @USERNAME - targets a specific player whose username is exactly %TEAM - members of the team $GROUPID - members of the group with ID radius-NUM - anyone within a
Placing - before any selector or player name will invert the selection and select everyone except those within the selection defined after -.
To illustrate, using the others selector is essentially the same as doing all,-me.
Example: :explode -radius-10 - explodes all players further than 10 studs from you.
Batch Commands
Multiple commands can be ran sequentially at a time by separating them using the batch key, which defaults to | (vertical pipe).
Additionally, you can insert timed delays using !wait <duration in seconds>.
Example: :ff me | :m Exploding everyone in 10 seconds! | !wait 10 | :explode all - gives you a forcefield and makes a message announcement, waits 10 seconds, then explodes everyone.
Repetition
Admins/moderators by default have access to the :repeat <times> <delay> command, which easily allows a command to be ran in a loop.
Example: :repeat 10 1 :sword me | :heal me - will give you a sword and heal yourself once every 1 second, for 10 times.
Reference Commands
:cmdsfor a list of available commands:cmdinfo <command>for detailed info about a specific command!brickcolorsfor a list of valid BrickColors (can be used in some commands which take a brickcolor argument)!materialsfor a list of material types:capesfor a list of preset capes available to admins:musiclistfor a list of preset audios:insertlistfor a list of assets that can be inserted using:insert <name>(set by the developer insettings.InsertList)
Section 2: The "UserPanel" GUI
The UserPanel GUI can be used to quickly access certain things in Adonis, such as commands, as well as configure Adonis client or server settings. This wiki page will go over the different tabs within Adonis's UserPanel GUI and what they do.
Info
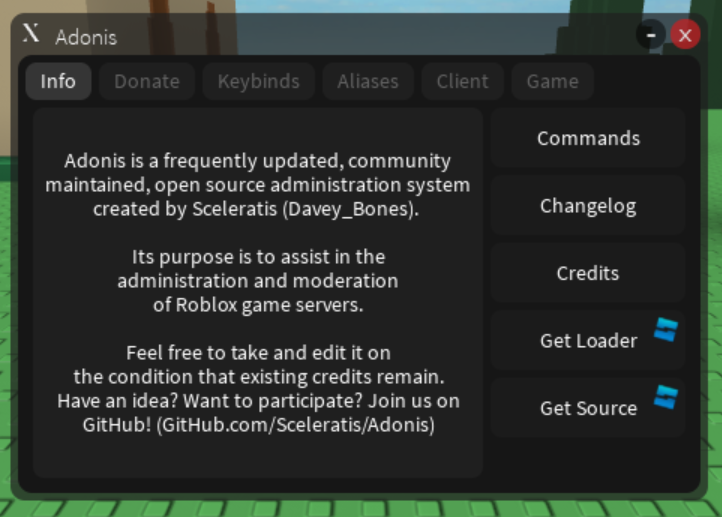
The info tab shows you information about Adonis, and gives the user convenient buttons to perform actions such as opening the command list, viewing the changelog, viewing credits, getting the loader, or getting the system's source in the form of its MainModule.
Donate
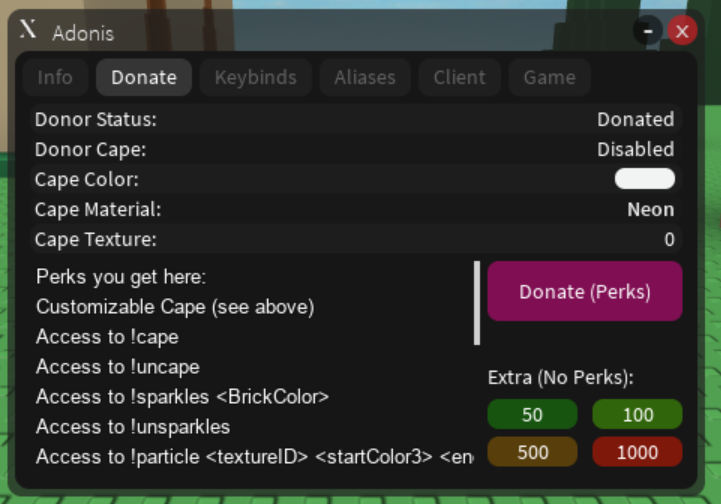
This is where users can donate to Adonis's development and control settings related to their donator perks. These perks can be disabled by the place owner in the settings module of the Loader. Donation perks are intended to be purely visual and should not impact gameplay. When users donate in your game, Roblox will give the place owner 10% of the sale.
Keybinds
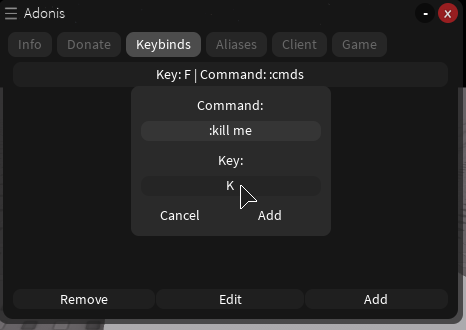
The keybinds tab allows users to bind command strings to a specific key, so when they press that key the specified command gets executed.
Aliases
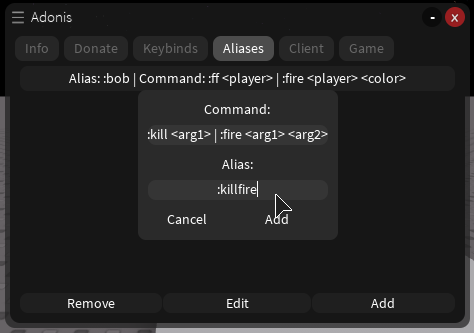
Aliases allow you to create custom commands that point to existing commands, or a combination of existing commands. When creating an alias, you can add markers for command arguments. The order the argument identifiers appear in the command string is the order the arguments will be replaced in.
To better understand lets go through what's going on in the above screenshot:
The command string :kill <arg1> | :fire <arg1> <arg2> is bound to :killfire
The following happens when :killfire scel Really red is ran:
- In the command string, both substrings for
<arg1>is replaced withsceland the substring<arg2>is replaced withReally red :killfire scel Really redis replaced by:kill scel | :fire scel Really red.- The new command string gets processed like any other command. In this case we are running two commands at once, in other words a "batch" command as indicated by the
|separating the two commands. The BatchKey setting can be used to change the|(vertical pipe) to whatever you'd like as long as it is not the same as the SplitKey or any of the Prefix settings.
It's important to note that the number of arguments is determined by the number of unique argument identifiers. Also, the actual text within the argument identifier is not important and is only used to match user-supplied arguments to where they should be. The order that these unique argument identifiers appear in the command string is what determines which which identifier will match argument 1, the next unique one found being argument 2, and so on. This is important to keep in mind. If you were to change the command string to :kill <arg2> | :fire <arg2> <arg1> and then chatted :killfire scel Really red scel would be assigned to <arg2> and Really red would be assigned to <arg1> so :killfire Really red scel would not work (as :kill scel would now be :kill Really red) It should also be noted that arguments that are intended to take spaces must appear last as otherwise portions of them may be treated as part of previous arguments when using the default SplitKey (a blank space.)
This system is currently still in development and may see improvements in the near future, such as manually defining in the alias string how arguments should be interpreted and matched to the command string. For now, you should not add argument indicators to the alias string. They should only be in the command string, and the order they appear is what currently determines the argument position they will be matched to in the chatted message.
Client
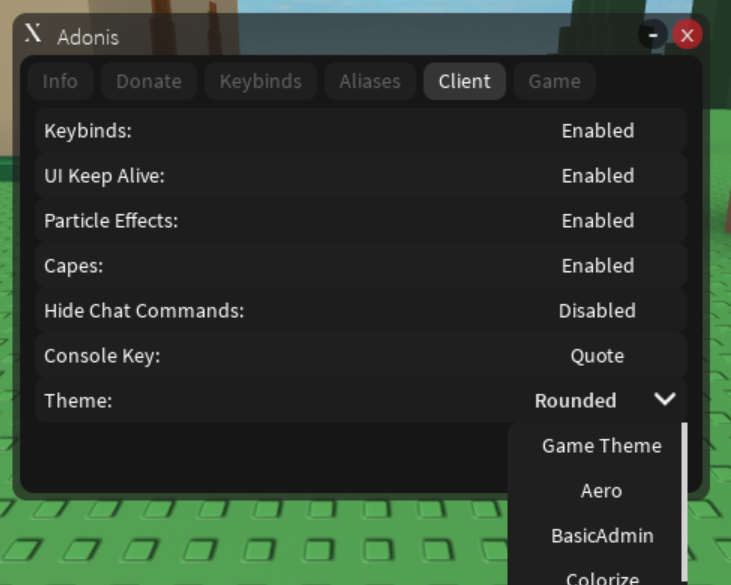
You've likely noticed that the UserPanel GUI in the screenshots here does not look like the default UserPanel. This is because Adonis supports multiple themes, my personal favorite being the Rounded theme (the one seen in these screenshots.) The default theme is named "Default" and is used for all UI development, and determines the default GUIs and UI modules used in the event the selected theme does not have the GUI being generated.
Users can choose what theme they would like to use by clicking the text next to the arrow pointing down next to the "Theme" listing.
There are also a few other client-specific settings. It should be noted that these settings are user-specific and only affect the user's client. They are not game breaking and only seek to offer finer control over certain things if the user wishes to do so.
Client Settings
| Setting | Description |
|---|---|
| Keybinds | Enables/Disables keybinds (if disabled, keybinds will no longer work until re-enabled) |
| UI Keep Alive | Determines whether or not Adonis should attempt to prevent the deletion of its GUIs when the player respawns. |
| Particle Effects | Adonis contains a number of commands that involve particle effects, which for some users may be irritating or even performance-impacting. All particle effects are local to each client and as such can be toggled using this setting. |
| Capes | Like particle effects, capes (such as donor capes) are handled locally and can be disabled. |
| Hide Chat Commands | Whether Adonis commands that you run via the chat will automatically be hidden from other players. |
| Console Key | This is the key that will open/close the command console (the bar that appears when you press the Quote key by default). |
| Theme | Allows you to select the UI theme you want to use. Changing this to "Game Theme" will use whatever theme is set in the Adonis settings module (in the Loader). This is used by default for all new users. |
Game
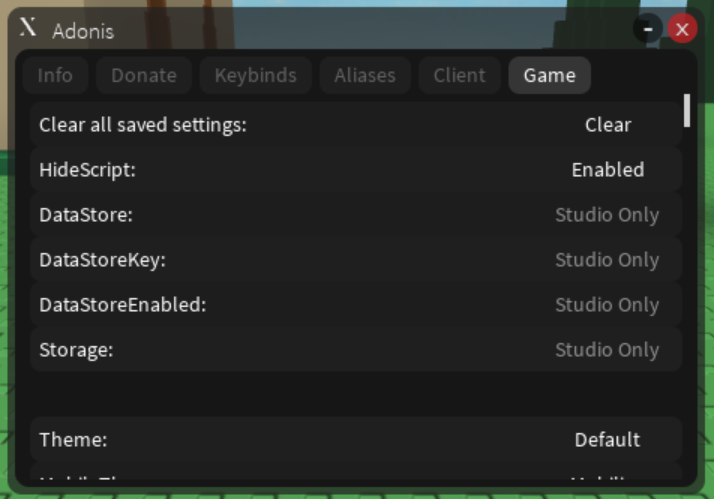
This is where creators can control Adonis related server settings for their game while in-game instead of in studio. "Clear all saved settings" will clear any settings previously written to the datastore. This is especially useful if you encounter issues after changing a setting in-game or quickly want to revert to only what is set within the settings module. Anything with "Cannot change" next to it can only be changed in studio currently.
If you ever change the prefix in-game and suddenly find yourself unable to open settings to fix it, running :adonissettings will open the UserPanel GUI and focus the "Game" tab so you can fix any issues. The :adonissettings command will always use : as a prefix so you can't accidentally change it to something unusable.
Section 3: UI Themes Showcase
The following are the themes that come with Adonis by default:
Default
| GUI | Screenshot |
|---|---|
| UserPanel |  |
| HelpButton | |
| Console |  |
| Notification |  |
| Message |  |
| Hint |  |
| Error |  |
Rounded
| GUI | Screenshot |
|---|---|
| UserPanel |  |
| Console |  |
| Notification |  |
| Error |  |
Colorize
Note: rainbow effects are animated with chromatic interpolation.
| GUI | Screenshot |
|---|---|
| UserPanel |  |
| Console |  |
| Notification |  |
| Message |  |
| Hint |  |
| Error |  |
BasicAdmin
This theme only changes the announcement GUIs.
| GUI | Screenshot |
|---|---|
| Message |  |
Aero
Made by @Expertcoderz.
| GUI | Screenshot |
|---|---|
| UserPanel |  |
| HelpButton | |
| Console |  |
| Notification |  |
| Message |  |
| Hint |  |
| Error |  |
Unity
Made by @LolloDev5123.
| GUI | Screenshot |
|---|---|
| UserPanel |  |
| HelpButton | |
| Console |  |
| Notification |  |
| Message |  |
| Error |  |
Windows XP
Made by @P3tray.
| GUI | Screenshot |
|---|---|
| UserPanel |  |
| HelpButton | |
| Console |  |
| Notification |  |
| Message |  |
| Hint |  |
| Error |  |
Section 4: Moderation Commands Reference
This section serves as a basic reference guide for the essential moderation commands offered by Adonis.
General
:kick <player> <reason>
Disconnects the specified player from the server. If specified, the reason is shown to the player.
Warning Players
:warnings <player>
Displays the specified player's warning log.
:warn <player> <reason>
Gives the specified player a warning, upon which they will be notified with the reason.
:kickwarn <player> <reason>
Gives the specified player a warning and kicks them; displays the warning reason in their kick message.
:removewarning <player> <reason>
Deletes the specified warning from the player's warning log.
:clearwarnings <player>
Clears the player's warning log.
Banning Players
:banlist
Displays a list of normal bans.
:timebanlist
Displays a list of time-banned users.
:trellobanlist/:sbl
Displays a list of users banned via Trello; only applicable if Trello integration is configured.
:ban/:serverban <player> <reason>
Bans the specified player from the current server. Note that they may still be able to join other servers.
:permban/:gameban <player> <reason>
Bans the specified player from all game servers, for an indefinite amount of time. Enforced immediately, so if the user is in a server other than where the command is run, they will be kicked by the system.
:tempban/:timeban <player> <duration (s/m/h/d)> <reason>
Bans the specified player from all game servers, for a specific amount of time. Enforced immediately.
Example: :tempban Player1 3d -- globally-bans Player1 for 3 days.
:trelloban <player> <reason>
Adds the specified player to the Trello ban list, if Trello integrations are configured for the game.
ℹ️ Tip: The above commands support full usernames for the <player> argument, which means you can ban specific users who are not currently in your server.
Player Notes
:notes <player>
Displays a list of notes on the specified player.
:note <player> <note>
Sets a note on the specified player.
:removenote <player> <note>
Removes a note from a specified player. Specify all for <note> to clear all notes on that player.
Section 5: Adonis Features Showcase
Here's a miscellaneous collection of some interesting features that many users of the Adonis admin system may not be aware of:
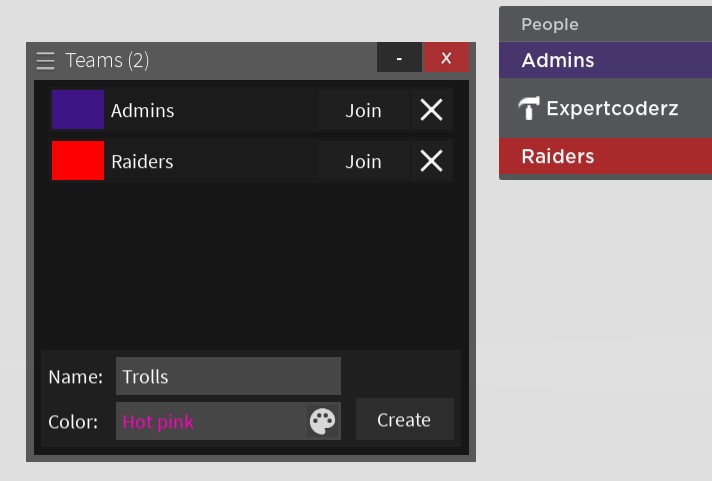
🚩 :teams
This is an interface that allows you to view, create, delete and join teams easily.
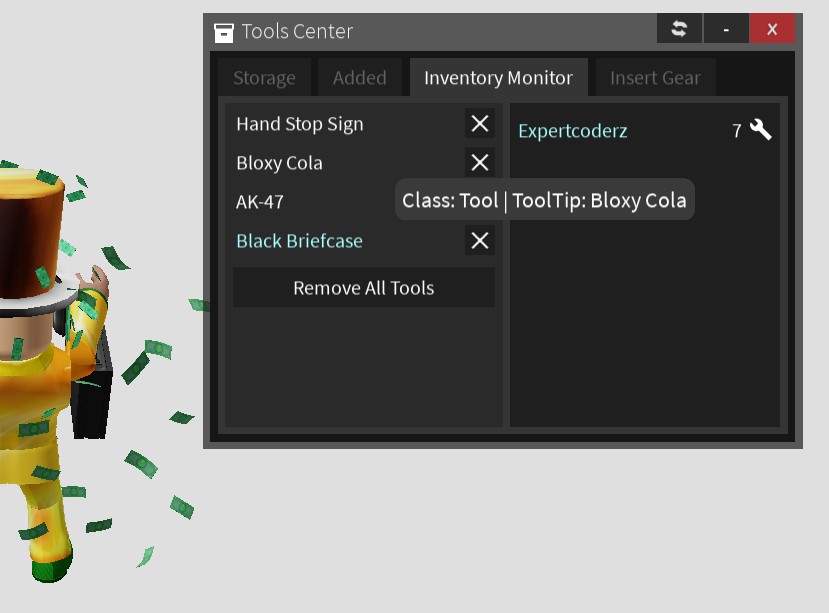
🛠️ :tools -- Inventory Monitor GUI
This utility allows you to view and manage players' backpacks via a user-friendly realtime inventory monitoring interface. An alternative to manually running the :viewtools <player>, :removetool <player> <tool name> and :removetools <player> commands.
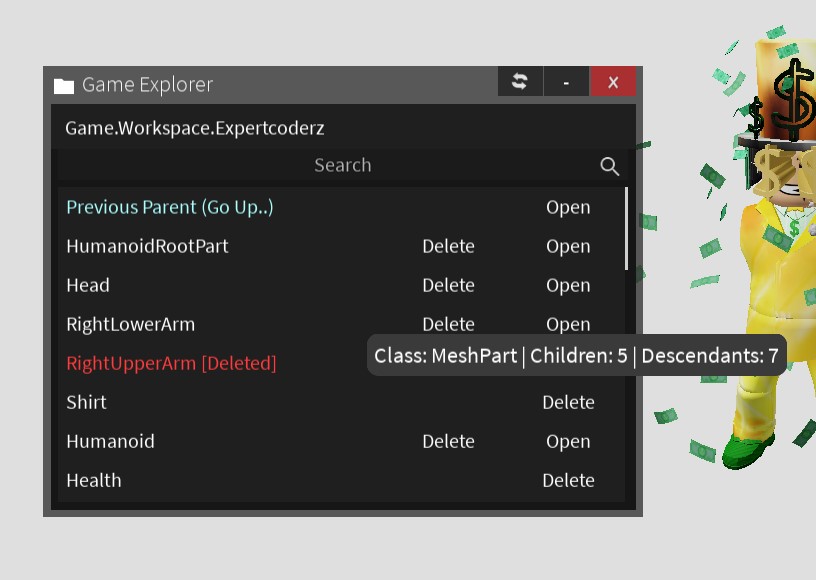
📂 :explorer
This is a built-in alternative to :dex which allows you to view and navigate the game's file structure as well as delete objects.
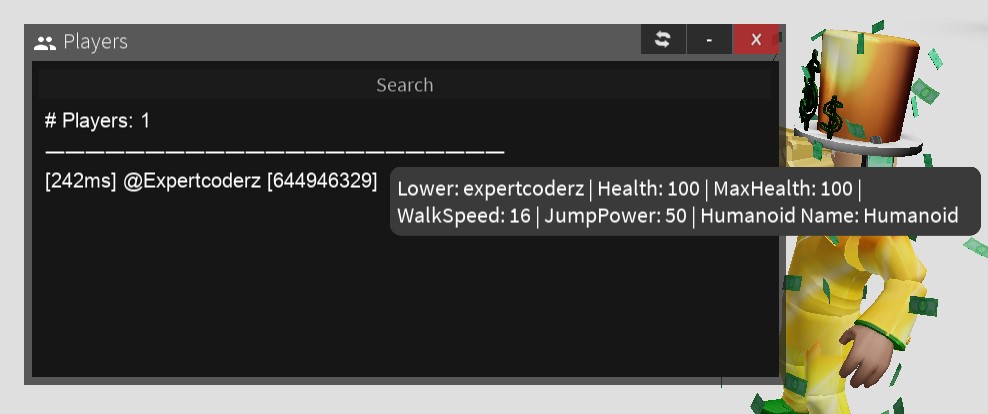
📃 :players
Displays full a list of in-game players along with some live-updated info about the state of their characters; may be useful for moderators if your game has the regular player list GUI hidden.
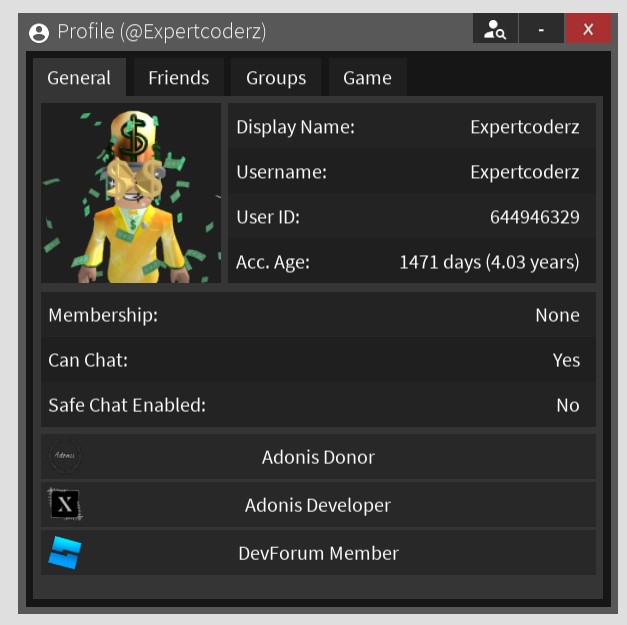
🔍 !profile <player>
Displays quite comprehensive information about a specific player.
Some details such as safechat status and the "Game" tab are hidden from non-admins for security reasons.
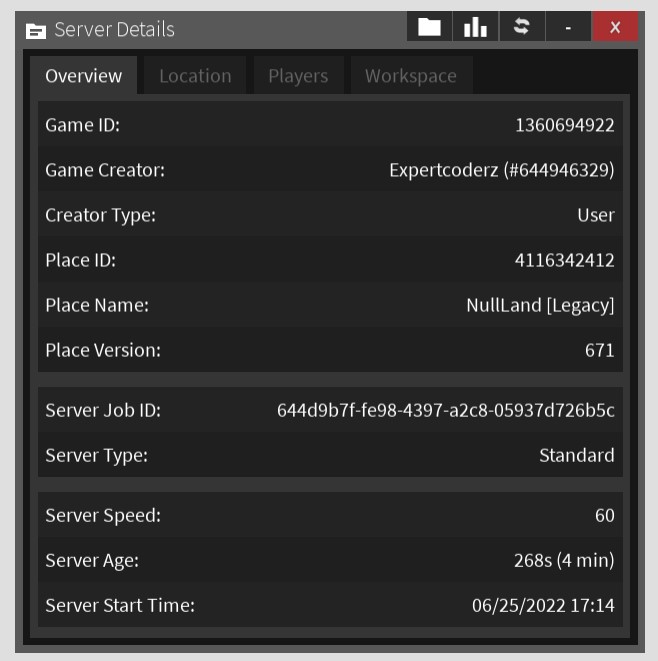
ℹ️ !serverinfo
Displays information about the current server.
Some details are hidden from non-admins for security reasons.
🕵️ :incognito <player>
A powerful command that allows admins to hide themselves from other players in the server by vanishing from their player lists.
That's all, folks!
Notice anything wrong? Submit an issue here or discuss it in our official Discord server.